
Ever lost the ‘off switch’ for a program? Sometimes software you’re running seems to have no inclination to stop: either you can’t find out how to quit, or the app has a problem and won’t respond to your q, CTRL+C, or whatever command should close it down.
There’s no need to panic, and certainly no need to reboot: just identify the process and quietly kill it. We’ll show you how, and look at what else can be done with knowledge of processes.
The full article can be found in The MagPi 46 and was written by Richard smedley. If you like this tutorial, you can find more in our Essentials book, Conquering the Command Line

Processes
Find the many processes running on your Pi with the ps command. On Raspbian, it’s usually called with the a and x switches which give all processes, rather than just those belonging to a user, the u switch shows processes by user, attaching it to a tty. w adds wider output, and ww will wrap over the line end to display information without truncating.
Type ps auxww to see, then try with just a or other combinations. You’ll notice that these options work without the leading dash seen for other commands. Both the lack of dashes, and the letters a and x, date back to the original Unix ps of the early 1970s; this was maintained through various revisions by one of Unix’s two family branches, BSD, and baked into the first GNU/Linux ps. Unix’s other branch, System V, extended and changed ps with new options and new abbreviations for command switches, so for ps ax you may also see ps -e (or -ef or -ely to show in long format).
The ps aux listing has various headers, including the USER which owns the process, and the PID (process identification number). This starts with 1 for init, the parent process of everything that happens in userspace after the Linux kernel starts up when you switch the Pi on. Knowing the PID makes it easy to kill a process, if it’s the easiest way of shutting it down. For example, to kill a program with a PID of 3012, simply enter kill 3012. To quickly find the process in the first place, use grep on the ps list. For example, locating vi processes:
ps aux | grep -i vi
The -i (ignore case) isn’t usually necessary, but occasionally a program may break convention and contain upper-case letters in its file name. You can also use killall to kill by program name; for example, with killall firefox.
Piping commands
Naturally, you can pipe ps’s output to select the PID and feed directly to the kill command:
kill $(ps aux | grep ‘[f]irefox’ | awk ‘{print $2}’)
We don’t have space for an in-depth look at awk (we’re using it here to print the second field of grep’s output, the PID), but the [f] trick at the beginning of Firefox (or whatever named process you want to kill) singles out the Firefox process. In the vi example above, grep found the grep process itself as well as vi (and anything with the letter sequence vi in its name).
The output of ps also shows you useful information like percentage of memory and CPU time used, but it’s more useful to see these changing in real time. For this, use top, which also shows total CPU and memory use in the header lines, the latter in the format that you can also find by issuing the command free. For an improved top:
apt-get install htop
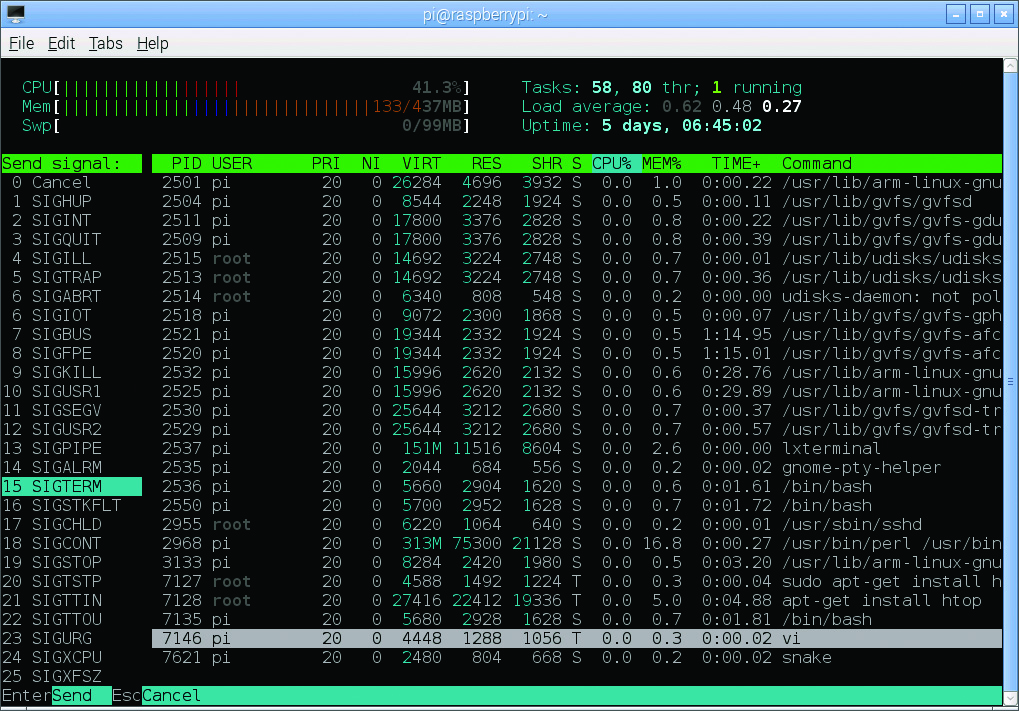
htop is scrollable, both horizontally and vertically, and allows you to issue commands (such as k for kill) to highlighted processes. When you’ve finished, exit both top and htop with q, although in htop you may care to practise by highlighting the htop process and killing it from there (see below). htop also shows load over the separate cores of the processor if you have a Pi 2 or 3.
Background job
Placing an ampersand after a command in the shell places the program in the background – try with: man top & and you’ll get an output like [1] 12768.
The first number is a job number, assigned by the shell, and the second the PID we’ve been working with above. man top is now running in the background, and you can use the job control number to work with the process in the shell. Start some other processes in the background if you wish (by appending &), then bring the first – man top – to the foreground with fg 1. Now you should see man running again.
You can place a running shell program in the background by ‘suspending’ it with CTRL+Z. fg will always bring back the most recently suspended or backgrounded job, unless a job number is specified. Note that these job numbers apply only within the shell where the process started. Type jobs to see background processes; jobs -l adds in process IDs (PIDs) to the listing.
Signals
When we sent a kill signal from htop, we were given a choice of signal to send. The most important are SIGTERM, SIGINT, and SIGKILL. The first was the default when we killed from htop, and is the signal that kill sends if not called with a modifier. It tells a process to stop, and most programs will respond by catching the signal, saving any data they need to save, and releasing system resources before quitting.
kill -2 sends SIGINT, the equivalent to stopping a program from the terminal with CTRL+C: you could lose data. Most drastic is kill -9 to send SIGKILL, telling the kernel to let the process go with no warning. Save this one for when nothing else works.
Mildest of all is the Hang Up (HUP) signal, called with kill -1, which many daemons are programmed to treat as a call to simply reread their configuration files and carry on running. It’s certainly the safest signal to send on a critical machine.
Staying on
nohup will run a program which will continue after the terminal from which it’s started has closed, ignoring the consequent SIGHUP (hangup) signal. As the process is detached from the terminal, error messages and output are sent to the file nohup.out in whichever directory you were in when you started the process. You can redirect it, as we did in part 4 (issue 34), with 1> for stdout and 2> for stderr; &> is a special case for redirecting both stdout and stderr:
nohup myprog &>backgroundoutput.txt &
One use of NOHUP for Pi users is to be able to set something in motion from an SSH session, that will continue after an interruption to that session. For example, restarting the network connection to which you are connected:
sudo nohup sh -c "ifdown eth0 && ifup eth0"
Note that the nohup.out log file created here will need sudo privileges to read – or reassign with:
sudo chown pi:pi nohup.out


