

Introduction: Raspberry Pi GPS Tracker
In this tutorial I'm going to attempt to create a GPS tracker using a raspberry pi with a GPS dongle and a little bit of linux. I didn't write most of the code used all I'm simply doing is gathering resources together and putting them all in one place. All references will be included.
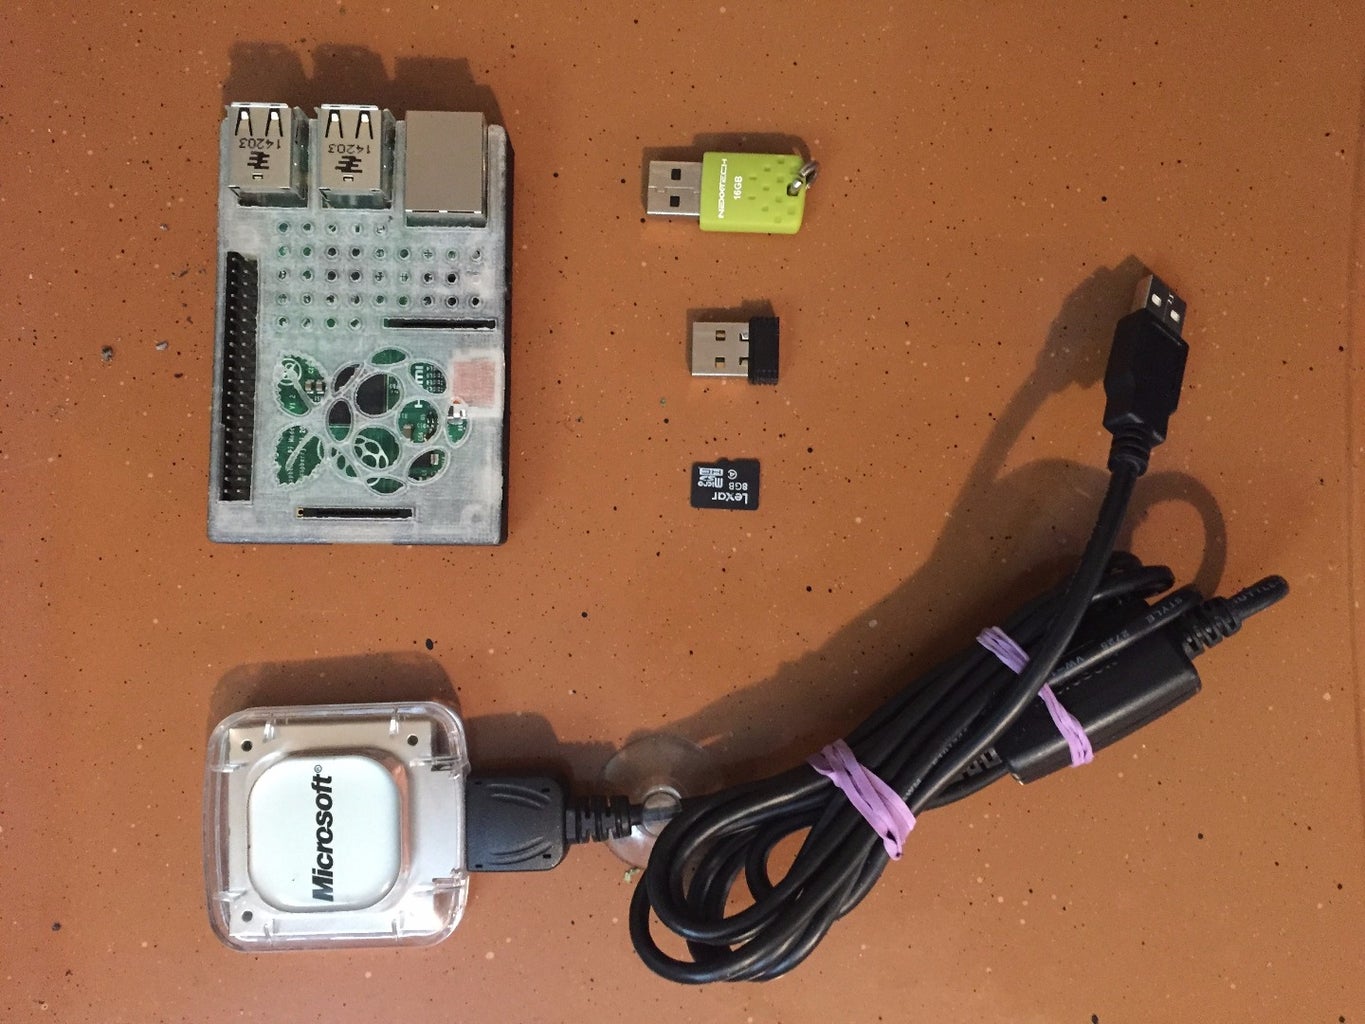
Things you will need:
- Raspberry Pi
- 8 GB or greater SD Card
- WiFi adapter (For SSH/VNC)
- GPS USB dongle (I'm using the Pharos GPS 360 but I think any will do)
- Flash Drive (Optional)
- External power supply (Optional)
Step 1: Installing Raspbian


There are plenty of tutorials online on how to install Raspbian on your Pi. I'm going to show you the way I did it using ApplePi Baker on OS X. You don't have to do it exactly like this but I found it to be a lot faster than letting the OS install nativity from the Pi.
Start by downloading Raspbian and saving it onto your Desktop then proceed to format the SD card to FAT32 using any method. I've used SDformatter.
Select your SD card from the top down menu and click Format. Open up ApplePi Baker and select the SD card from the left side menu. Then click on Restore Backup and find the image you downloaded from the Desktop.
When you're done baking your ApplePi, pop the SD card into the Raspberry Pi and you're ready to go.
Step 2: Set Static IP Address


This part is optional but is highly recommended if you need to control the Pi remotely and can't have a display hooked up to it.
Start off by setting the IP address to static by right clicking on the network icon in the top right corner and select WiFi Networks (dhcpcdui) Settings.
Select the network interface in this case wlan0 and put in the following:
IP Address : 192.168.2.56
Router : 192.168.2.1
DNS Servers : 8.8.8.8
DNS Search : 8.8.4.4
"Check ifconfig to figure out your gateway address as it may be different from what I have above"
Here's a tutorial if you want to do it manually.
Step 3: Install TightVNC

Open up a terminal and type in the following command and type "Y" if prompted
sudo apt-get install tightvncserver
Run TightVNC by executing:
tightvncserver
You will then be asked to enter a password of your choice.
To run TightVNC on startup navigate to "/etc/init.d/" from a terminal and create a script with the following:
#! /bin/sh
# /etc/init.d/vncboot
### BEGIN INIT INFO # Provides: vncboot # Required-Start: $remote_fs $syslog # Required-Stop: $remote_fs $syslog # Default-Start: 2 3 4 5 # Default-Stop: 0 1 6 # Short-Description: Start VNC Server at boot time # Description: Start VNC Server at boot time. ### END INIT INFO
USER=pi HOME=/home/pi
export USER HOME
case "$1" in start) echo "Starting VNC Server" #Insert your favoured settings for a VNC session su - $USER -c "/usr/bin/vncserver :1 -geometry 1280x800 -depth 16 -pixelformat rgb565" ;;
stop) echo "Stopping VNC Server" /usr/bin/vncserver -kill :1 ;;
*) echo "Usage: /etc/init.d/vncboot {start|stop}" exit 1 ;; esac
exit 0
Save it as vncboot and make it an executable and run the following
chmod 755 vncboot
Reboot your Pi and login from a VNC client. Be sure to add ":1" at the end of the IP address this step is important.
The full tutorial can be found here.
Step 4: Setting Up GPS


This tutorial can be found here.
Plug in your USB dongle and make sure you can see it by using the following in the terminal:
sudo lsusb
You should the see the Prolific Technologies listed which means you're good to go.
Install GPSD by using the following command:
sudo apt-get install gpsd gpsd-clients python-gps
Try to acquire a fix by typing in cgps -s and you should get a location. If the GPS times out use the following:
sudo killall gpsd
sudo gpsd /dev/ttyUSB0 -F /var/run/gpsd.sock
To see GPS coordinates in a GUI interface type xgps into the terminal.
Step 5: Tracking and Saving Location

No we are going to automate the process so that when you power up your Raspberry Pi it'll work as a GPS tracker and save the raw data to a flash drive.
Start by plugging in a USB flash drive (this part is optional if you don't want to store to an external source).
Type lsblk into the terminal to find your USB flash drive directory. Once you've found it we need to make a script that start automatically when you boot up the Pi.
Make sure you're in the pi folder
$ cd ~
Create and save a script file.
$ sudo nano gpspipe
Then copy the following and save it. (replace ******* with the name of your USB path)
#!/bin/bash
gpspipe -r -o /media/pi/*******/rawgps.txt
Open up .bashrc for configuration
$ sudo nano .bashrc
Scroll down to the bottom and add the line: ./gpspipe
Change the permission of your script by typing in the following:
sudo chmod 755 gpspipe
Now every time you boot your Raspberry Pi it'll automatically log the raw data to your flash drive.
Tutorial on start up scripts is here.
Step 6: Plotting and Viewing

Here's where all that work comes in. Now that you have raw data you can plot them on Google Maps using any method you find online. I used GPS Visualizer for simplicity sake.
I've included a screenshot of a walk I took around my campus. The data seemed wonky but when I took it for a drive it was a lot more accurate. It got jittery again when I was at stop lights but other than that it was pretty solid.
There's still plenty about this topic that I'm still unfamiliar, but I've got google to thank. This segment is part of a bigger project dubbed Project Payload. The ultimate goal of the project is to send a GPS/GSM capable weather balloon that can be tracked via satellite and retrieved. It would act as a probe for all kinds of data like atmospheric pressure and temperatures.
If you have any feedback please don't hesitate to comment as this project is in it infancy.


