There are plenty of home security cameras currently on the market, many allowing you to stream live footage over the internet and receive alerts whenever someone wanders past. But rather than buy one of those, two makers, Aaron Tainter and Davis Lau, spied an opportunity. Combining a Raspberry Pi Zero W, a Pi Camera Module, and the amazing OpenCV app, they decided to make their own: The Smart Security Camera.
The inspiration to do so felt obvious. “We’re known for mixing artificial intelligence and computer vision with our DIY projects, so a smart security system seemed to align well with our genre,” explains Aaron. The pair have previously created numerous home-automation projects, ranging from an indoor gardener to a smartphone-connected door lock. “I think our security camera resonates with people. The object-recognition part is really fascinating.”

This article first appeared in The MagPi 64 and was written by David Crookes.
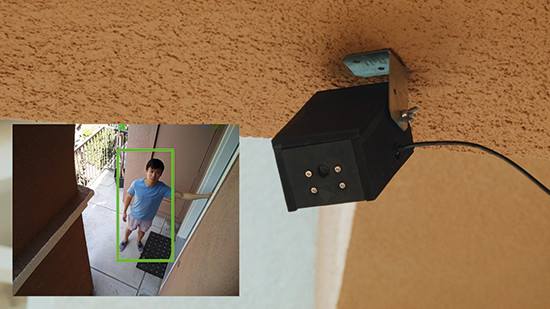
OpenCV makes adding computer vision to Pi projects rather straightforward. It allows you to train the Raspberry Pi to identify objects and react to them, which is perfect given that Aaron and Davis wanted their smart security camera to feature facial and body detection. The plan was for the camera to send an email notification whenever it detects someone, although it can be set up to stream live video through a webcam server too.
“We also wanted to add a servo-gimbal so that you could tilt and pan the camera from the web app,” says Aaron. “But because we typically give ourselves a month to complete a project like this and have to film and edit the build videos for our YouTube channel, by the time we finished building the camera body we didn’t have enough time left for it.”
Smart housing for Smart CCTV camera
That seems a shame, but then building the camera’s MDF housing was a tricky process, with various holes needed in the right places to gain access to the Pi. “We also wanted to make the top removable so that the components were more accessible but compact enough that it could be mounted on a ceiling,” says Aaron, explaining that a CAD model was built first so that they could get the measurements just right when they cut the materials.
Fortunately, writing the code for the web app proved easier and they were thankful OpenCV exists and could (after a staggering eight hours) be installed on the Pi Zero. “Without OpenCV, the project wouldn’t have been possible,” Aaron explains. “It contains thousands of lines of code that were written over the course of many years and it gives individual developers like us the chance to produce something awesome without years of research and development.”
The pair still needed to tinker with it. “We had to make a few optimisations to get the camera working at a high frame rate because OpenCV eats up the CPU,” Aaron recalls. There was also an issue with the video feed being choppy, solved by parallelising a few processes in the code. But before long, the camera was allowing the viewing of live streams, detecting objects and sending any images it picked up on to a Gmail address.
“The Raspberry Pi Zero is a great piece of hardware because it has a small form factor yet comes loaded with features,” says Aaron of the reason why it works so well in the camera. “It was the perfect platform to mount in a small case and run our image-recognition software. I’m surprised how much performance you can get out of that tiny computer.”
See also:
Discover electronics in The MagPi 64
HomeGuard: home security and monitoring
AIY Projects: Vision Kit: build your own intelligent camera
Quick Facts about the Smart Security Camera
- The project requires lots of drilling and woodwork
- The camera’s housing is made in two connecting parts
- It uses OpenCV – a computer vision software library
- The camera’s object detection is better at lower angles
- Aaron and Davis list their other projects at hackerhouse.site
Create your own smart security camera

Step-01: Build the housing
After designing the housing and creating paper templates for guidance, a ¼-inch (6 mm) MDF board is cut to size. The pieces are then glued and screwed together before being sprayed black.
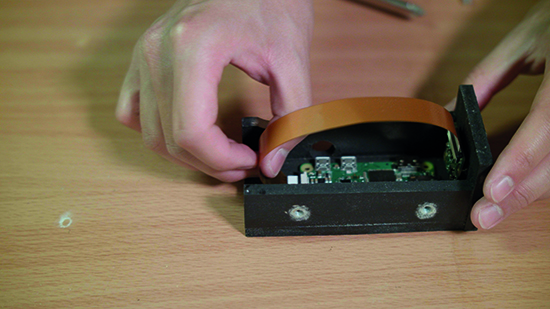
Step-02: Insert the bits
The Pi Zero W and Pi Camera Module connect via an Adafruit Pi Zero Camera Cable. Future versions may contain a NoIR Pi Camera: “It’s supposed to have exceptional low-light capabilities.”

Step-03: Sending it out
An MbientLab micro-USB to USB cable powers the device and OpenCV software is used. “I’d like to try different ‘image classifiers’ to recognise other objects like cats and dogs,” Aaron says.