Greetings my fellow curious humans!
I thought I'd start the really-basic-electronics series with the Automation HAT, which looks like a very complicated thing, but is in fact just a HAT full of switches!
What's automation?
You've probably automated something in your house. Your heating comes on at a certain time and goes off again. Maybe you've got posh heating that goes off when your house gets to the right temperature. Even posher and each room gets a different temperature setting. Maybe you've got one of those plug things that switches the TV on and off when you're on holiday.
Automation is all around us, and is built into loads of gadgets and gizmos.
So an Automation HAT is an on-and-off device?
The Automation HAT is basically a joiner of circuits, which you can control using the Raspberry Pi. The reason it says 24V tolerant is because you can run circuits that use up to 24V, but nothing higher. Mains electricity is 230V here in the UK, and 120V over in the USA, so don't even think about it.
You can control the circuits by making them go on and off at certain times. You could make them go on and off depending on something you read with a sensor, like the temperature or light level.
Lets start with some examples. Maybe you want to check if your plant needs water, and water it if it needs it. A moisture sensor that you push into the soil will check whether it needs water or not, and a pump could pump some water out of a bottle and onto your plant.
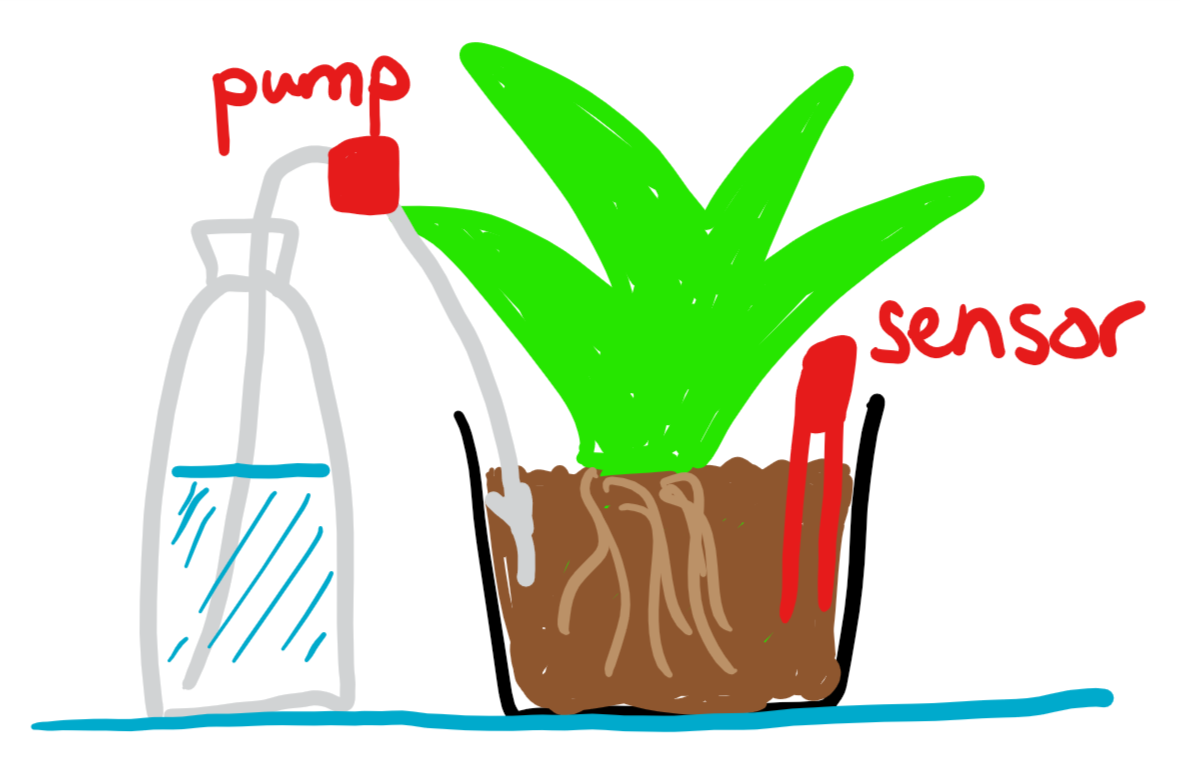
You could use the moisture sensor to send a message to the Pi, and then use the Pi to send a message to the pump, with the Automation HAT acting as the on off switches.
But wait. There are LOADS of connections on the Automation HAT! How do you know which ones to use? This is where we're going to have to go off on a tangent.
What do all those bits do?
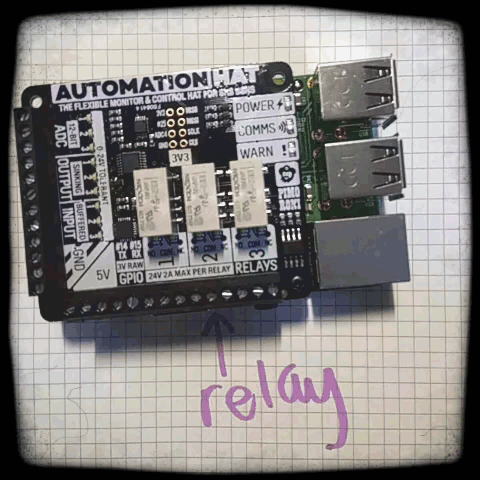
Let's have a look at the board, and the documentation that we put on GitHub (there is documentation like this for every board we do, although if you aren't used to the parts and terminology, they may need translating).
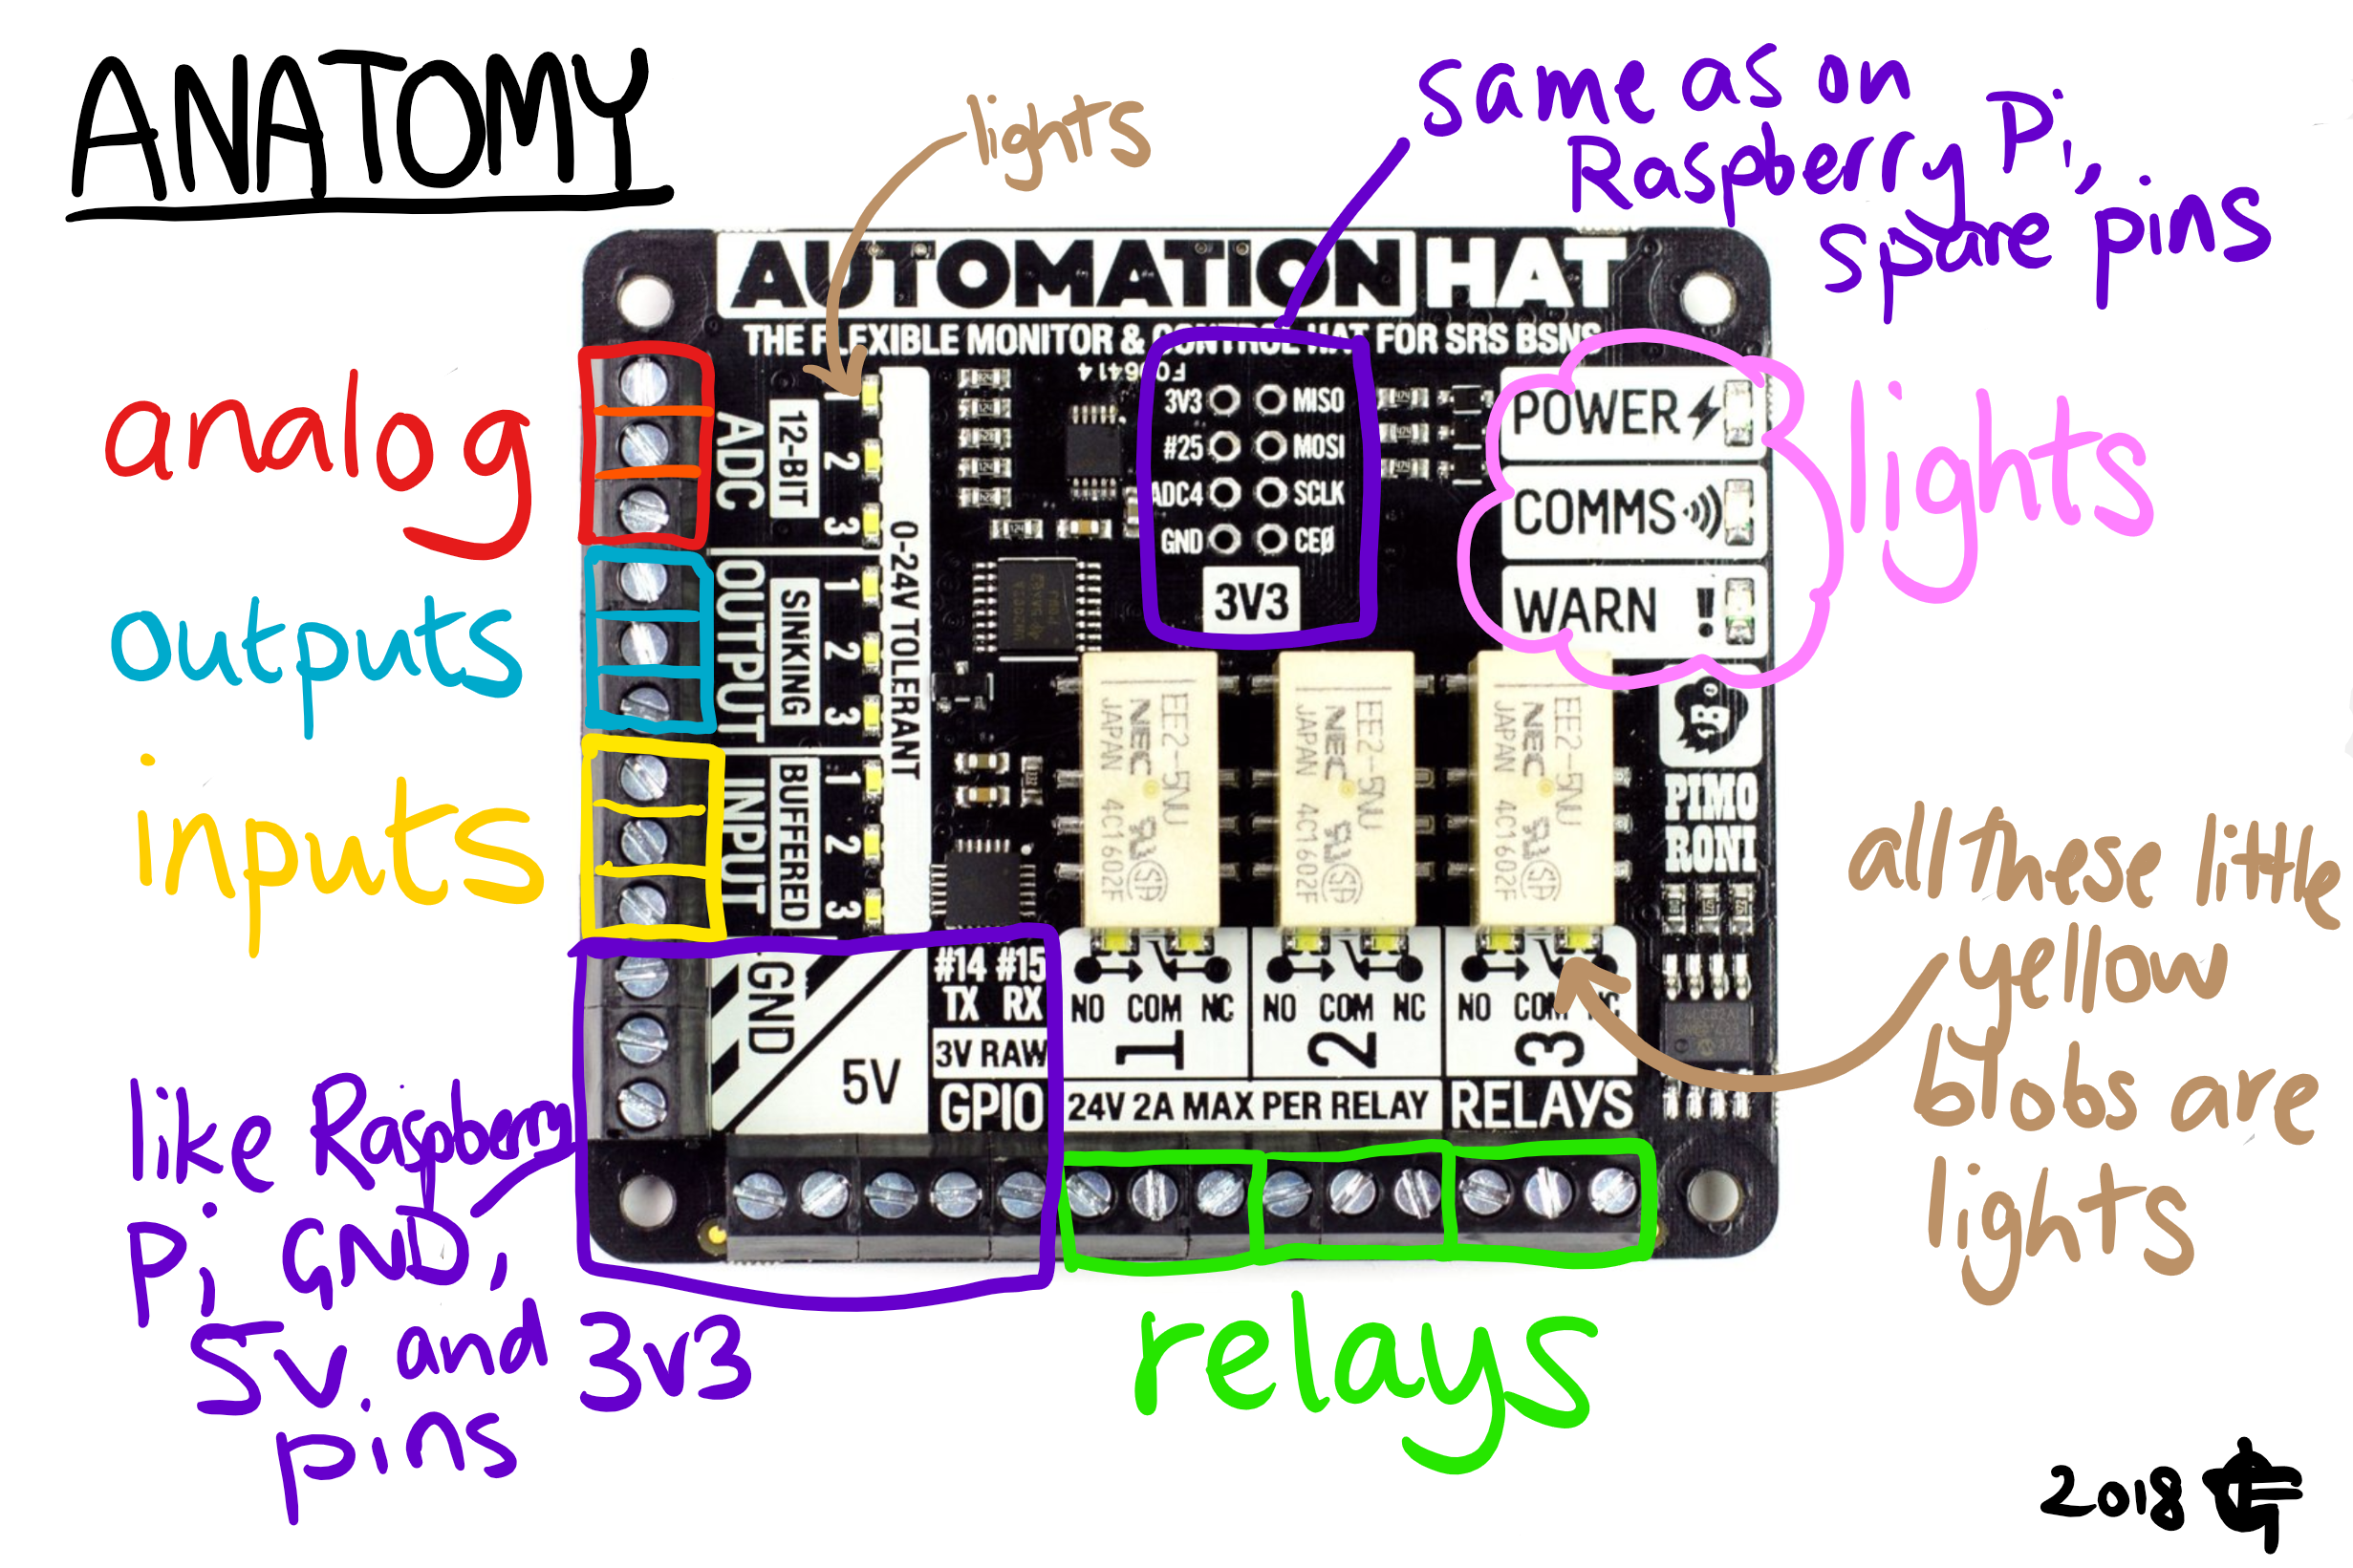
Signals in
We'll begin with analog and inputs, because they're BOTH types of input. This is where you pick a space to plug your sensor in to.
An analog input can be any value, so for instance you could plug in a thermometer and use it to read all the different temperatures.

The inputs can read lots of values, but only send two signals - on or off. If a tiny voltage or a zero voltage comes through the sensor, it stays off. If more than 3V (and less than 24V, because anything bigger will do "Bad Things" to your Automation Hat) comes through the sensor, it stays on.
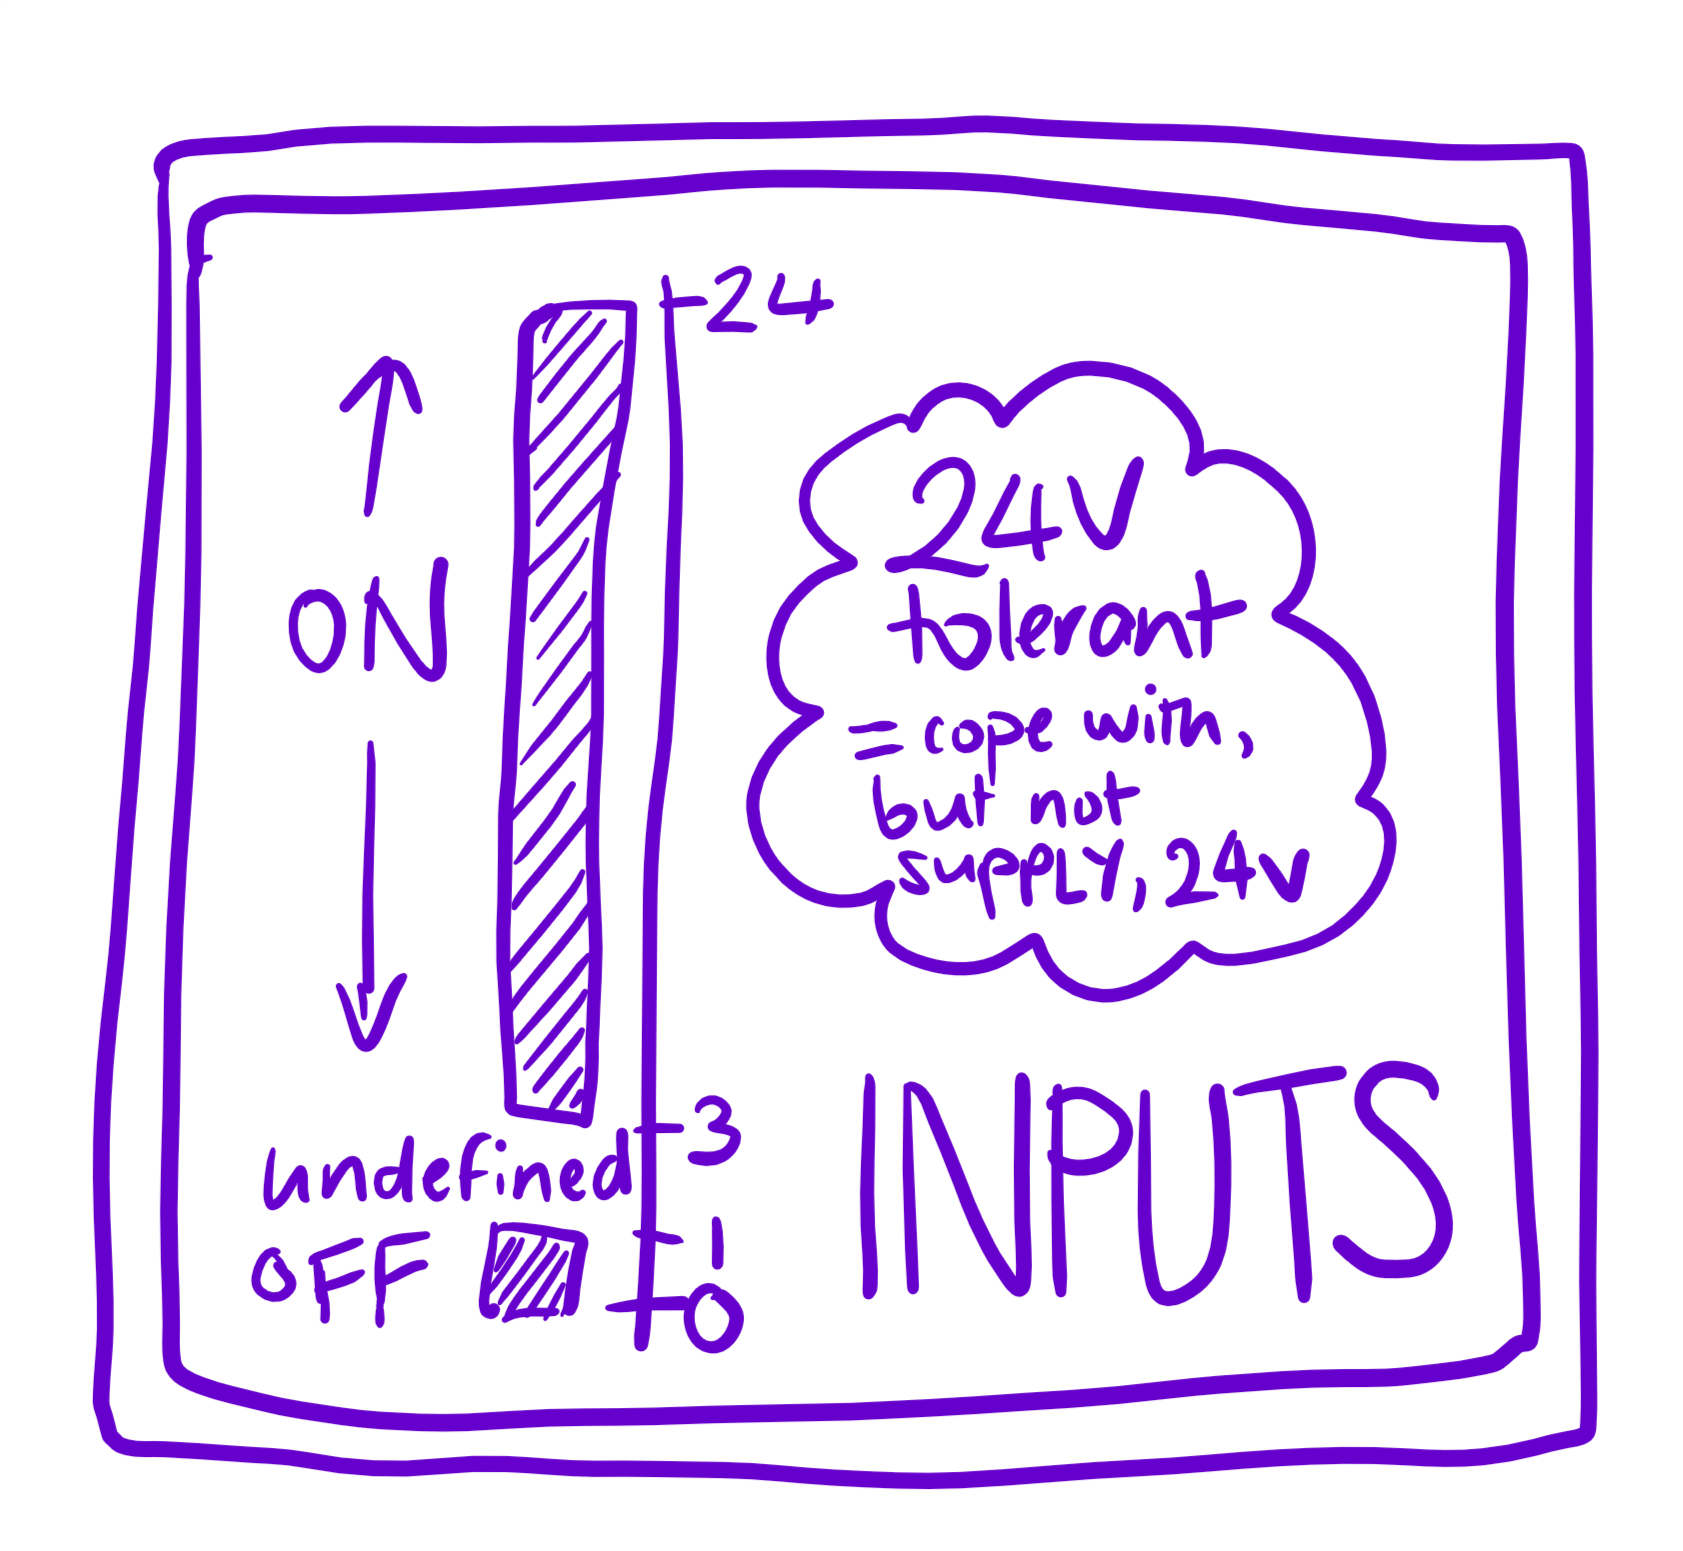
So, it should be clear now that if you want an on or off, use input. If you want a range of information to act upon, use analog (marked ADC on the board).
Signals out
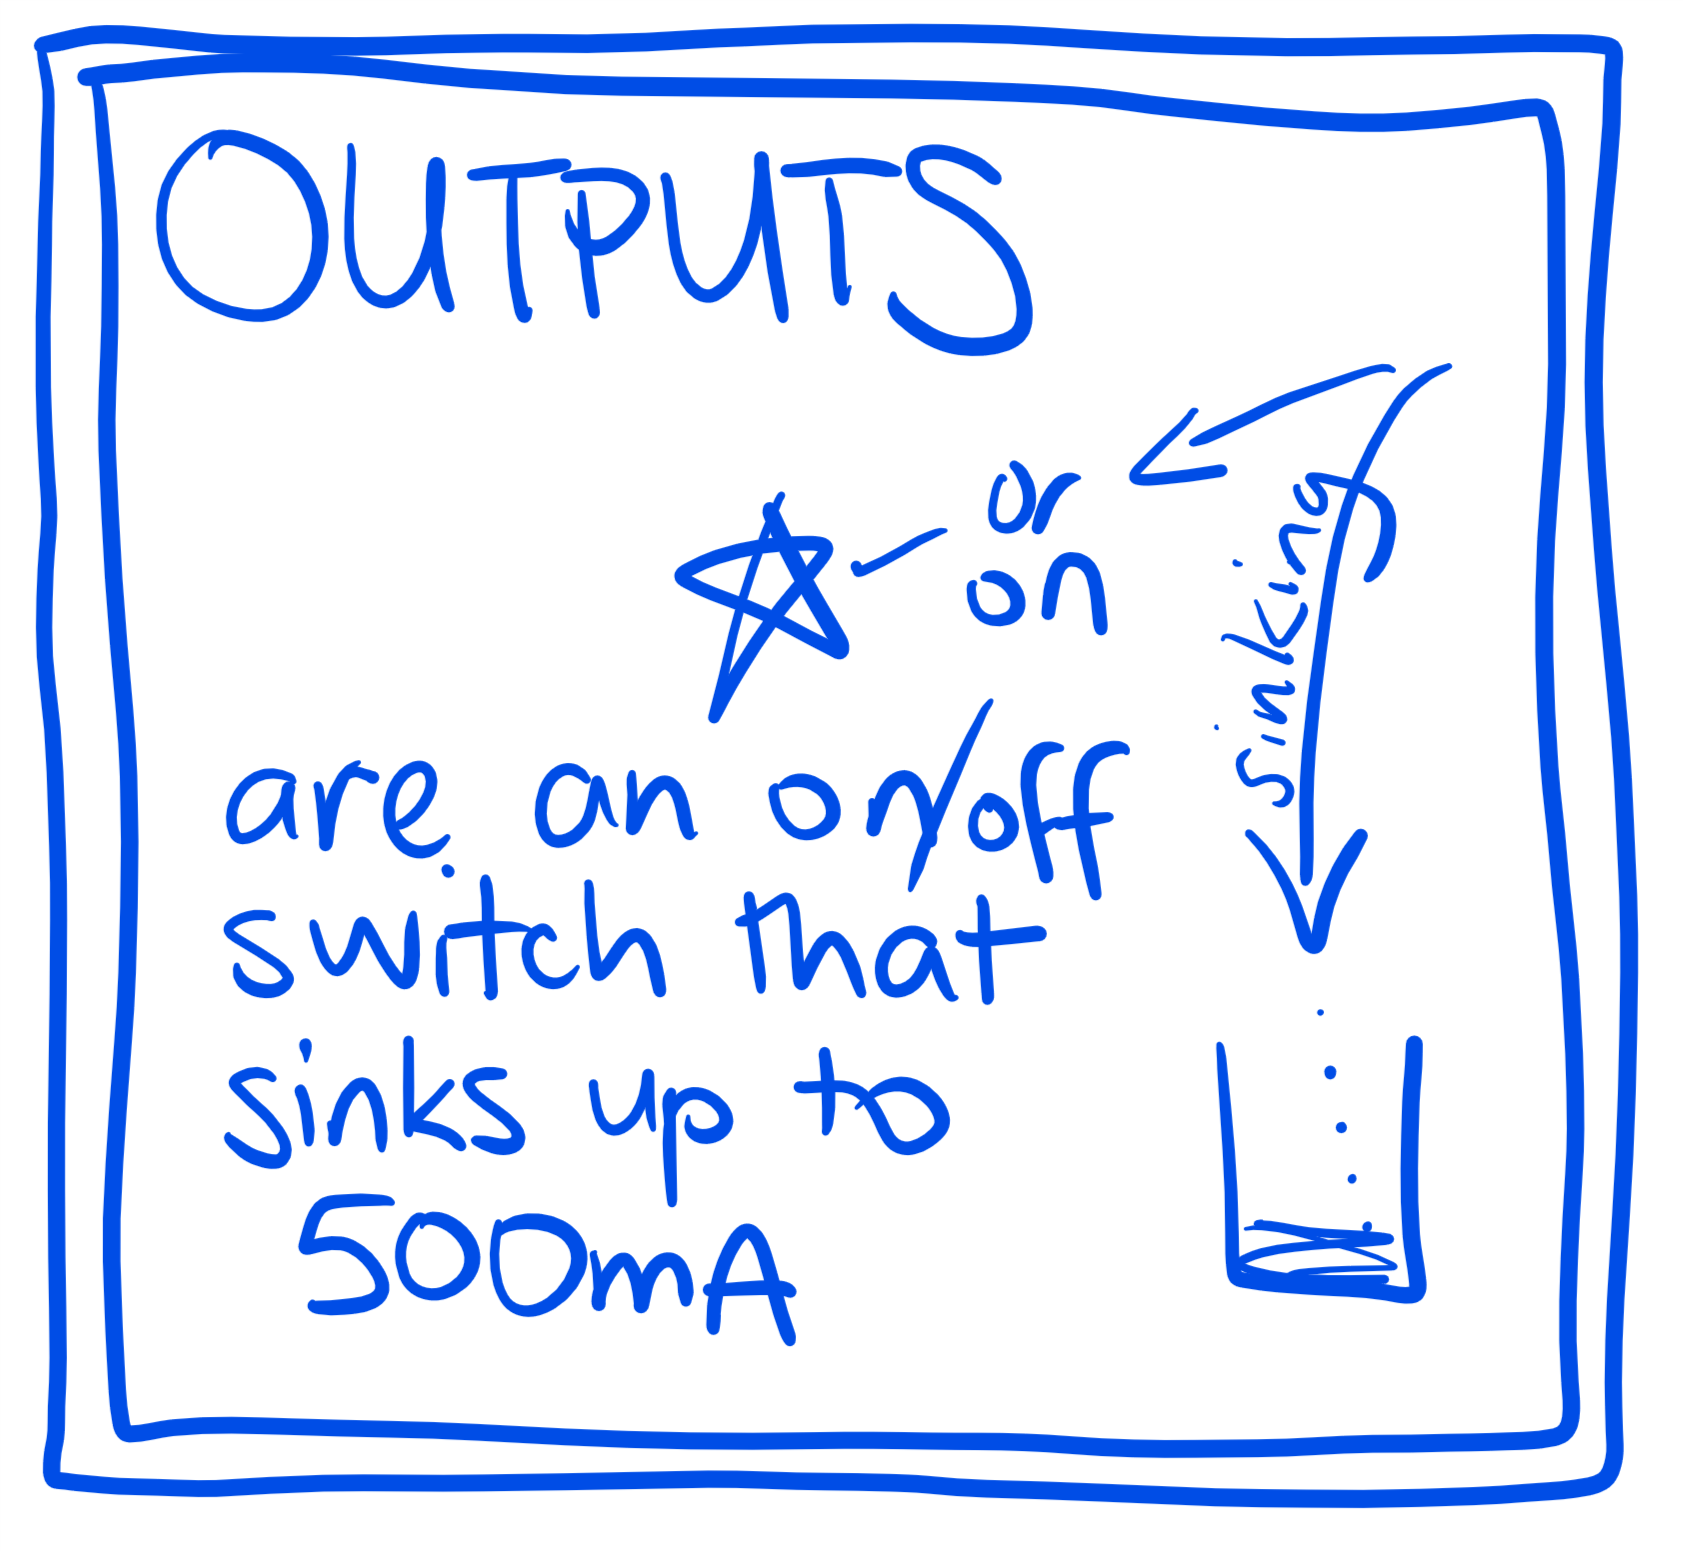
We have two types of input, and guess what? Two types of output!
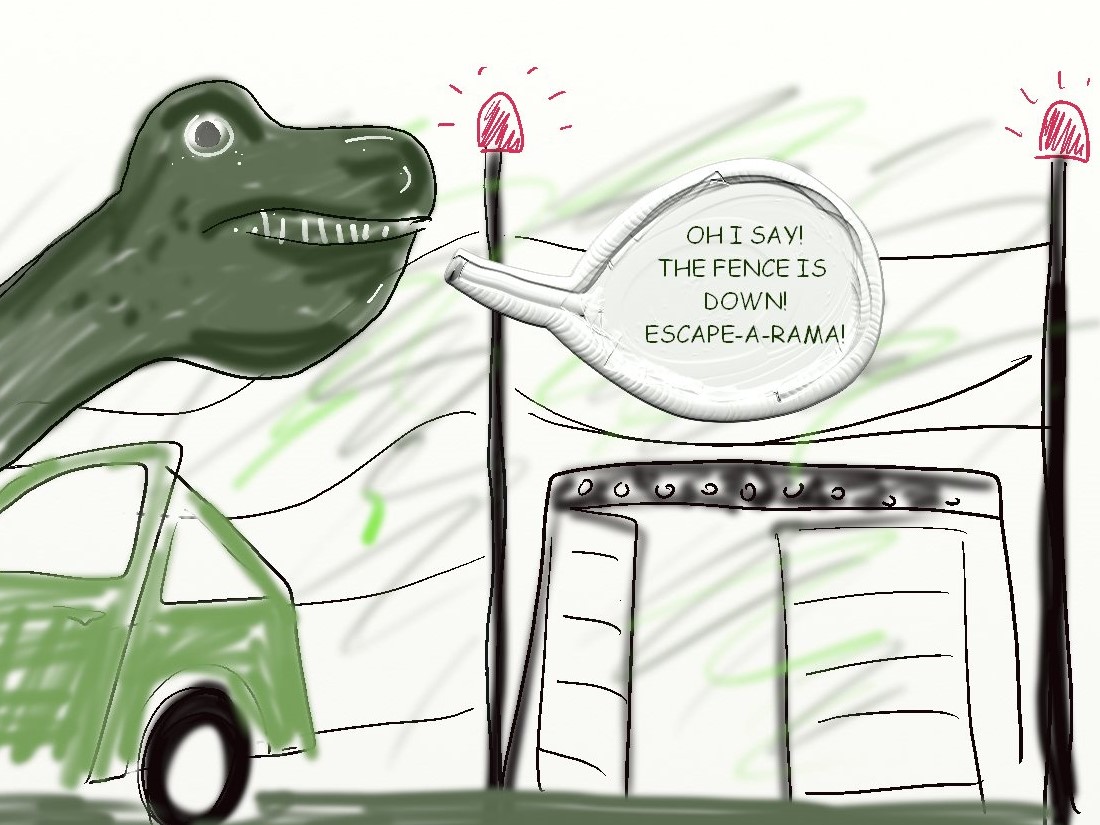
One of them (output) takes your electricity (it's a bit more technical, but go with this) and holds back the bit that would give your device the energy until the output is turned on, and then WHOOSH, the electricity flows again. Like putting up an electric fence in Jurassic Park with the red lights - when the velociraptors see that the electric fence isn't working, they can escape.
There are three outputs, and between them they can cope with 500mA of current, any more than that and they get hot and "Bad Things Happen".
The other, (relay) is a switch that either completes the circuit (and electricity flows) or doesn't complete the circuit (and no voltage gets round). It can cope with 2A of current going through, but after that we get the Too Hot problem again. This time the dinosaur trainers can open and shut gates to hold back up to 24V of angry velociraptors, which is physically what happens inside the relay. Except without the velociraptors. :(
They both do on or off, so why use one over the other? It's worth having a bit more detail here. It's useful, and kinda fascinating.
We'll start with outputs. They are essentially on or off because of electricity, which can travel at the speed of light, so it can switch on and off really fast. In fact, you can even use it to do something called Pulse Width Modulation (PWM) which is a fancy name for turning things on and off very fast. You can choose how long it is actually on for in each "pulse".
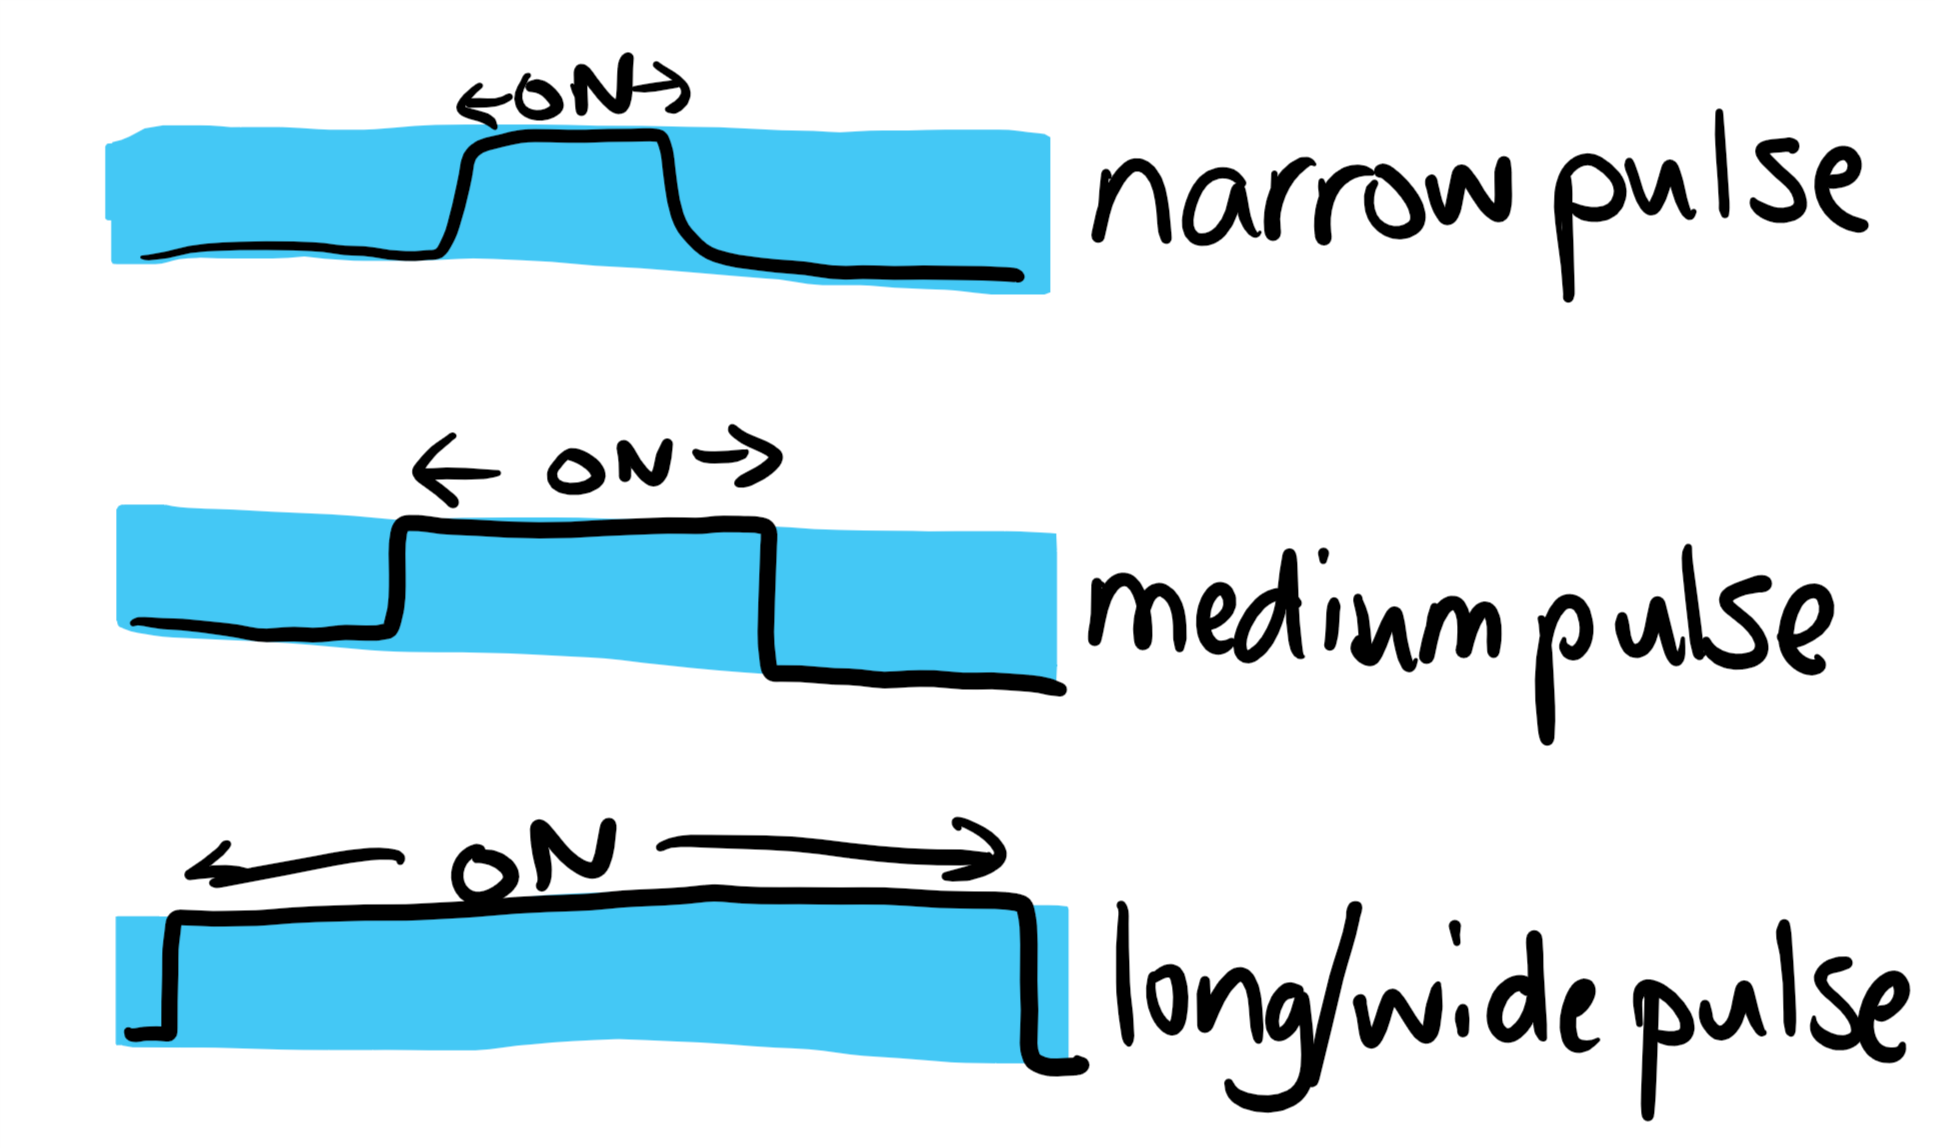
Your eyes can't see these changes (electricity, speed of light etc) so a narrow pulse (like at the top) will make a light bulb appear dim, compared to a wide pulse where it's being given a bigger dose of electricity.
Bad things about outputs though - they can't cope with a lot of current and get all hot and bothered over 500mA.
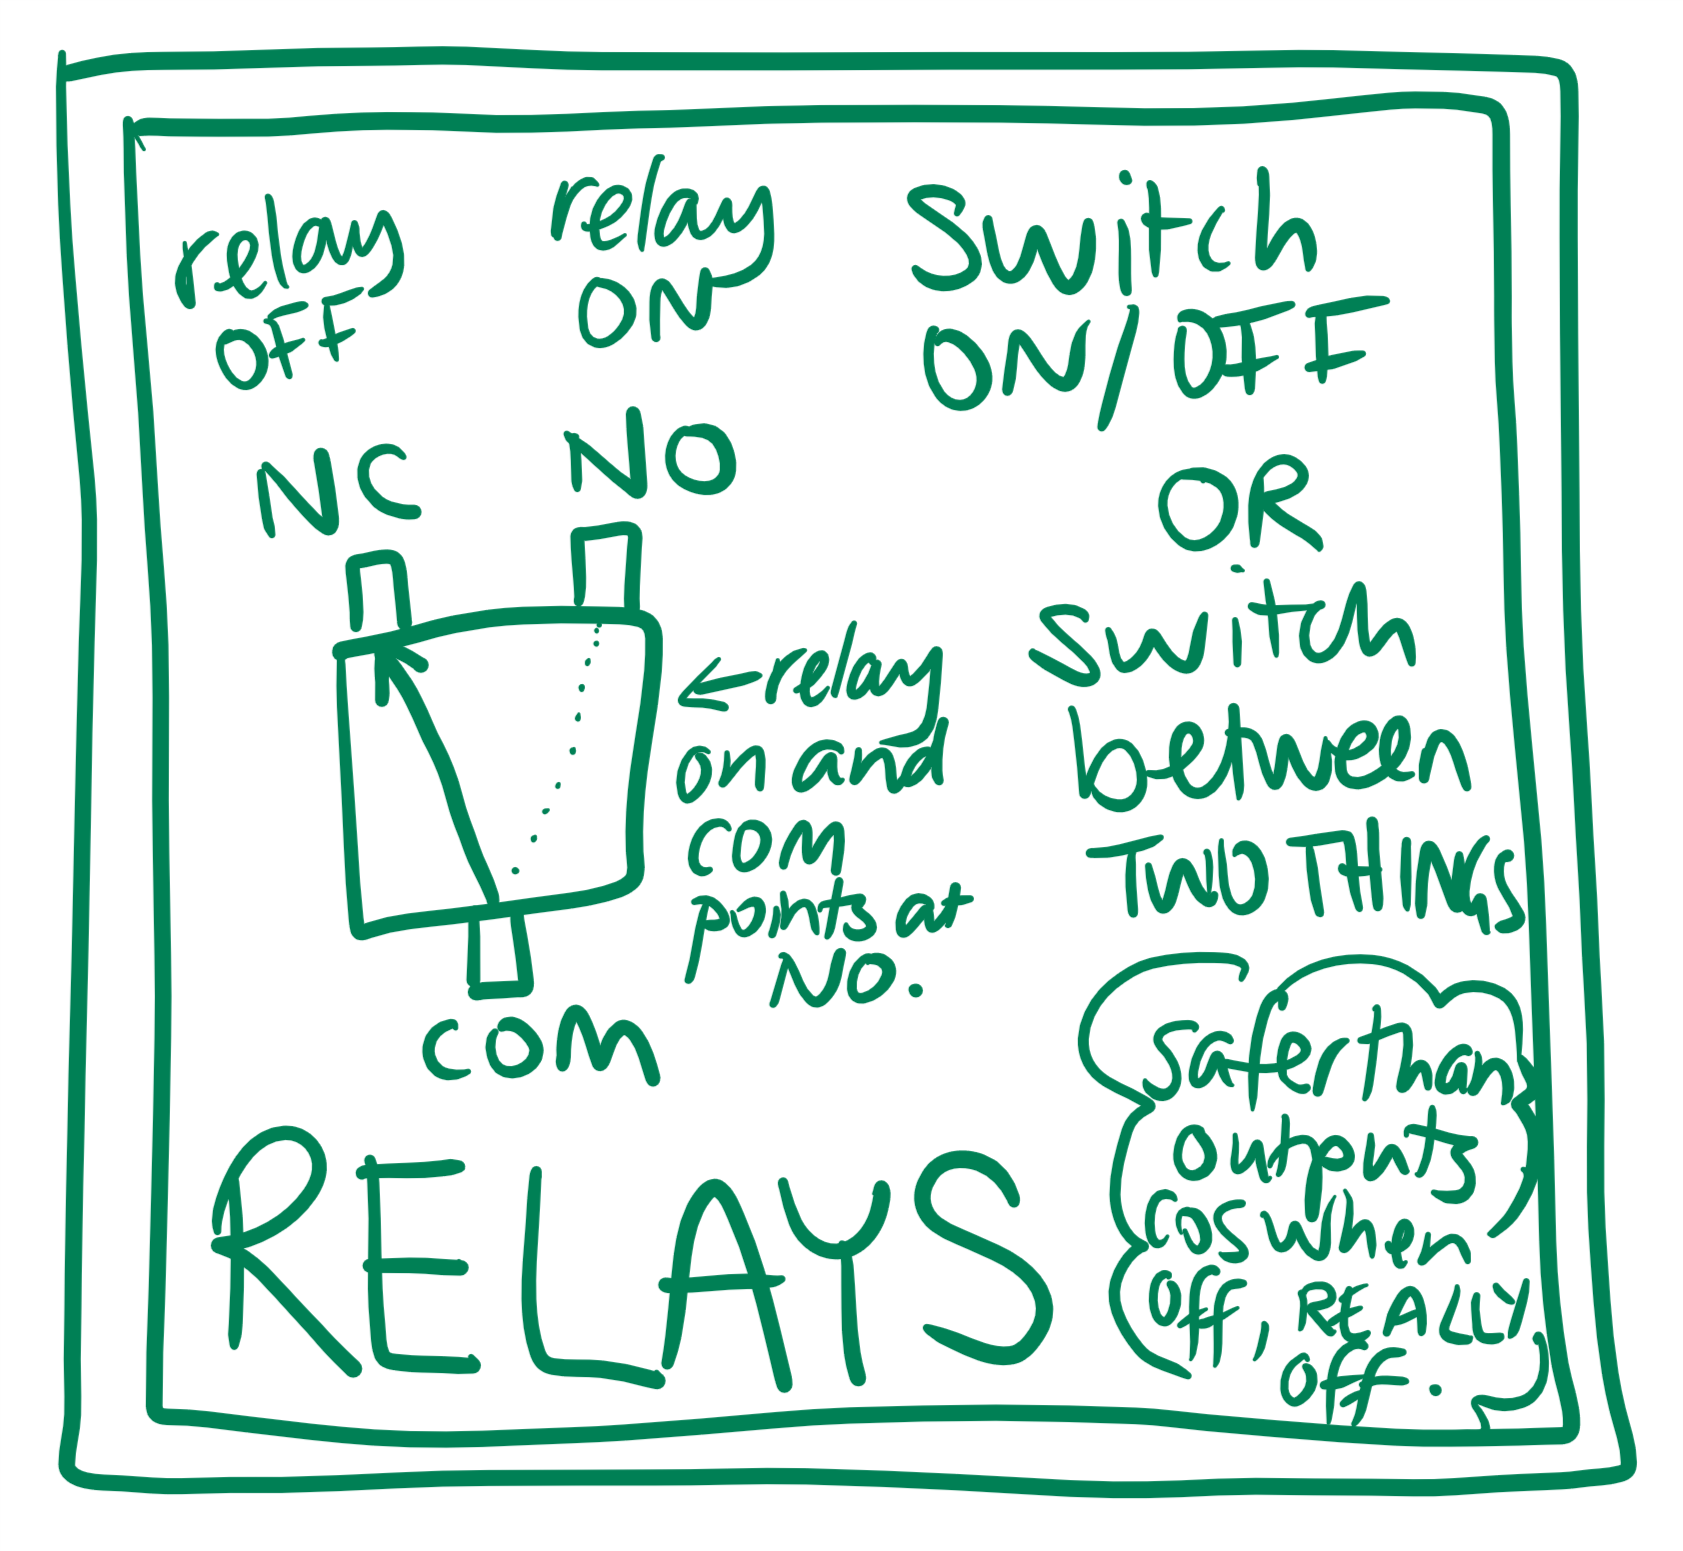
The relays however, are a mechanical device. Inside those little beige boxes are a switch and an electromagnet.
When you decide to turn it on, the electromagnet pulls the switch to the other side and connects your circuit. When it's off, it snaps back to the original side (Normally Closed, or NC). It's kind of like a clothes peg. Normally closed, and the bit that you squeeze is the Normally Open side. The side that you should connect to your circuit is called Normally Open or NO, because when you're not using it, it sits there open and unjoined up, breaking your circuit and not letting any electricity flow.
The relay thing is better with an animation.

So, a relay is a mechanical switch, which means two things, it's not as fast at changing as the electrical one, and it will also eventually wear out (try bending the ring pull on your can of pop back and forth and you'll see what I mean). However it's safer, electrically, than the output.
Back to the plants!
Now we've had a look at the main parts of the Automation HAT, let's make a decision about the plant waterer.
| Part | Good things | Bad things | Examples |
|---|---|---|---|
| analog | range of values | have to write code to deal with it | temperature, mass, light level |
| input | clear on or off | no detail, sometimes voltage isn't high enough to trigger it | alarm, full, pressure pad, motion sensor |
| output | can do PWM, switch quickly | can only sink up to 500mA over all three combined, leaves circuit live | buzzers, things that need a quick response |
| relay | when off is REALLY off, can connect two circuits to same relay, can cope with 2A current per relay | slow compared to output, will wear out eventually | pumps, indicators, lights |
We know that the plant either wants watering, or it doesn't. This means that we could use an input and connect a moisture sensor to the Automation HAT. We know that the pump should be pumping water, or not pumping water, and it's not going to be going ON OFF ON OFF ON OFF all the time, so a relay is fine.
What about all the other pins and lights?
Since they are repeats of the Raspberry Pi pins, I won't be going over them in this post. All you need to know is that you can control the Power, Comms and Warn lights really easily, and technically you can control the other lights (by each input/output/etc) but it needs a little more code tweaking.
Hope you enjoyed the whistle-stop tour of the Automation HAT and better understand what to use it for. Here's a microscope photo of the relay!
